WordPress is one of the most popular content management systems (CMS) in the world, powering more than 40% of all websites on the internet. While it is a versatile and user-friendly platform, sometimes you may need to uninstall WordPress from your cPanel hosting account. This could be because you want to start fresh with a new website or switch to a different CMS. If you’re not sure how to uninstall WordPress from cPanel, don’t worry! In this article, we’ll provide you with a step-by-step guide on how to do it.
We’ll cover all the necessary steps to completely remove WordPress from your cPanel account, including backing up your website files and database, deleting the WordPress installation, and removing the database and user.
Before we begin, it’s important to note that uninstalling WordPress is a permanent action. Once you delete your WordPress installation, all your website files, images, posts, and pages will be deleted. Therefore, it’s essential to back up your website before proceeding with the uninstallation process.
Step 1: Back up your website files and database
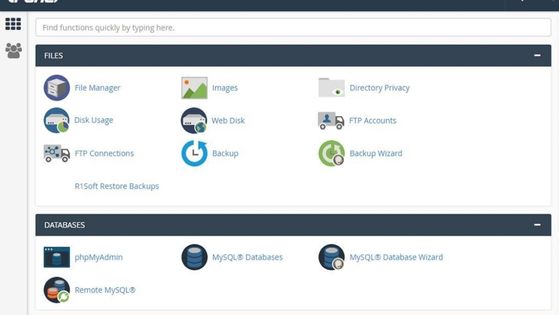
Before uninstalling WordPress, you should back up your website files and database to prevent any data loss. To do this, log in to your cPanel account and navigate to the “Backup” section. Click on the “Download a Full Website Backup” option and select the backup destination. You can choose to download the backup file to your computer or save it to your hosting account.
Next, you’ll need to export your WordPress database. To do this, navigate to the “Databases” section in cPanel and click on “phpMyAdmin.” Select your WordPress database from the left-hand sidebar and click on the “Export” tab. Choose the “Quick” export method and click on the “Go” button to download the database file to your computer.
Step 2: Delete the WordPress installation
Now that you have a backup of your website files and database, you can proceed with deleting the WordPress installation from your cPanel account. To do this, navigate to the “File Manager” section in cPanel and locate your WordPress installation directory. Typically, WordPress is installed in the public_html folder.
Right-click on the WordPress folder and select the “Delete” option. A pop-up window will appear asking you to confirm the deletion. Click on the “Confirm” button to delete the WordPress folder and all its contents.
Step 3: Remove the WordPress database and user
After deleting the WordPress installation, you’ll need to remove the WordPress database and user from your cPanel account. To do this, navigate back to the “Databases” section in cPanel and click on “MySQL Databases.”
Scroll down to the “Current Databases” section and locate the WordPress database you exported earlier. Click on the “Delete” button next to the database name to remove it from your cPanel account.
Next, scroll down to the “MySQL Users” section and locate the user associated with the WordPress database. Click on the “Delete” button next to the user name to remove it from your cPanel account.
Step 4: Verify that WordPress has been uninstalled
After completing the above steps, you should verify that WordPress has been successfully uninstalled from your cPanel account. To do this, open a new browser tab and navigate to your website’s URL. If you see an error message or a blank page, it means that WordPress has been successfully uninstalled.
If you still see your website, it means that some files or folders associated with WordPress may still be present on your hosting account. You’ll need to locate and delete these files manually to completely remove WordPress from your cPanel account.
Step 5: Clean up any remaining WordPress files
If you still see your website after deleting the WordPress installation, it’s possible that some files or folders associated with WordPress are still present on your hosting account. To completely remove WordPress from your cPanel account, you’ll need to locate and delete these files manually.
Here are some common locations where you may find remaining WordPress files:
- wp-config.php file – This file contains your WordPress database information and may still be present in the public_html folder or the root directory of your hosting account. If you find this file, delete it.
- .htaccess file – This file is used to configure server settings for your website and may still contain WordPress-specific rules. Check the public_html folder for this file and delete it if present.
- wp-content folder – This folder contains your website’s images, themes, and plugins. If you want to keep any of these files for future use, download them to your computer before deleting the wp-content folder.
- Uploads folder – This folder contains all the images and files you uploaded to your website. If you want to keep any of these files, download them to your computer before deleting the uploads folder.
- Any remaining WordPress folders – Check the root directory of your hosting account for any remaining WordPress folders, such as wp-includes, wp-admin, or wp-includes. If you find any, delete them.
Once you’ve deleted all the remaining WordPress files, refresh your website to ensure that it has been completely uninstalled from your cPanel account.
Conclusion
In conclusion, uninstalling WordPress from cPanel may seem like a daunting task, but with the above steps, it can be done easily and efficiently. Remember to back up your website files and database before starting the uninstallation process to avoid any data loss. Additionally, be thorough when deleting WordPress files and folders to ensure that your website is completely uninstalled from your cPanel account.